Looking to give your WordPress website a fresh new look? If so, you may be wondering how to install a WordPress theme.
WordPress themes are pre-designed templates or stylesheet layouts that determine a WordPress website’s appearance and overall design. They control the visual elements, such as the color scheme, typography, page layout, and other stylistic elements.
There are a myriad of free and paid themes available on the WordPress theme directory as well as on third-party sources. The best part? Installing these themes is incredibly easy and requires minimal effort from you.
In this article, we will walk you through different methods of theme installation. So let’s dive in and explore the various ways you can install a theme for your WordPress website.
Method #1: Using the WordPress Theme Directory
Learning how to install a WordPress theme using the “WordPress Theme Directory” is a simple procedure that grants you access and quickly installs a wide range of free themes. Here’s a step-by-step guide on how to do it:
Log in to WordPress Admin Dashboard
You can access it by adding “/wp-admin” to the end of your website’s URL (e.g., www.yourwebsite.com/wp-admin).

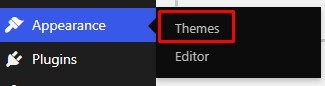
Navigate to Appearance > Themes
Once logged in, navigate to the “Appearance” tab on the left-hand side of the dashboard and click on “Themes.”
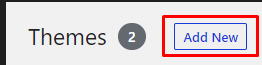
You will be directed to the Themes page, which displays your currently installed themes. To add a new theme, click the “Add New” button at the top of the page.

You can browse various featured, popular, and recommended themes on the Add Themes page. You can also use the search bar to find specific themes by name or keyword.
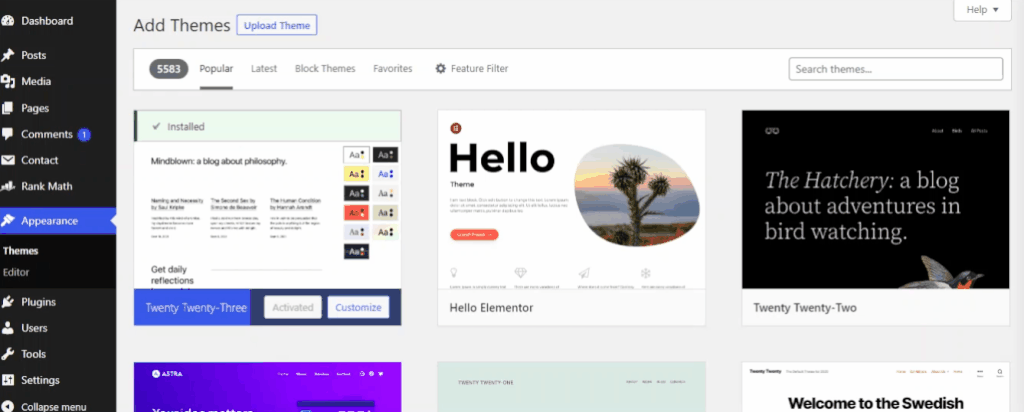
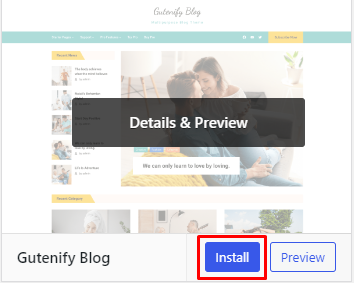
Once you find a theme you like, hover over it, and you will see a “Preview” button. Clicking on it will allow you to preview your website’s look with that particular theme.
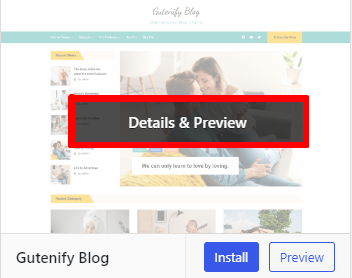
If you’re satisfied with the preview & its features and want to install the theme, click on the “Install” button. WordPress will then download and install the theme for you.
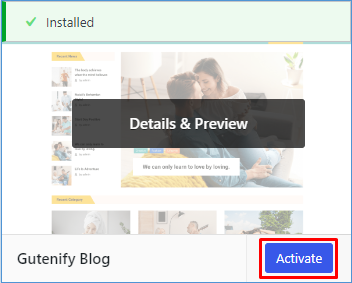
Click on Activate
After installation, the “Install” button will change to an “Activate” button. Click on it to activate the theme and make it live on your website.
You have successfully installed and activated a theme from the WordPress Theme Directory. To match your preferences, You can customize the theme further, such as colors, fonts, and layouts.
Method #2: Installing Theme via the Upload
If you have a premium or custom theme you obtained from a third-party source, you can easily install it on your WordPress website using the upload method.
Here’s a step-by-step guide on how to install a theme via the upload method:
Click on the “Add New” Button
Click on the “add new” button in the theme option.
Next, click on the “Upload Theme” button, which you can find right next to the “Add Themes” title.

You will be prompted to choose the theme file (.zip format) from your computer. Click on the “Choose File” button, locate the theme file on your computer, and select it.
Click on Choose File
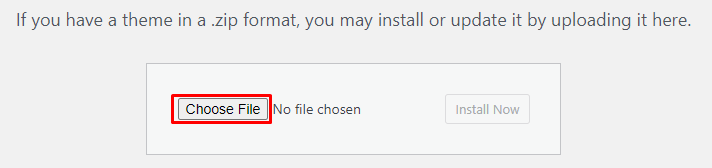
After selecting the theme file, click on the “Install Now” button. WordPress will then upload and install the theme for you.

Once the installation is complete, you will see a success message. From there, you can choose to activate the theme by clicking on the “Activate” link.

Ultimately, you customize the theme to suit your website’s needs.
Method #3: Manual Installation via FTP (File Transfer Protocol)
If you prefer a more advanced approach or encounter any issues with the previous methods, you can manually install a WordPress theme using FTP (File Transfer Protocol). Here’s a step-by-step guide on how to do it:
Download Theme Files
Start by downloading the theme files from a trusted source to your computer. The theme files should be in a .zip format. Extract the contents of the .zip file. This will create a folder containing the theme files.
Login to Your Site’s Cpanel
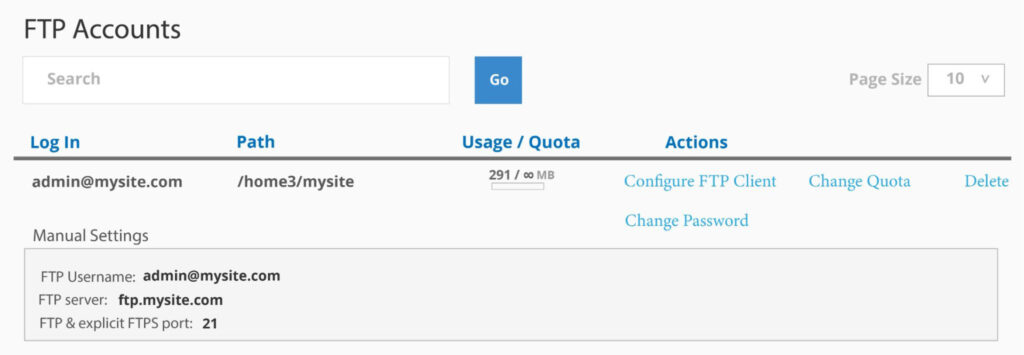
Log in to your site’s cpanel and navigate to the “FTP Accounts”.

Input the information by entering the details for creating a new FTP client account. After creating, you’ll see a detailed table of the FTP server’s hostname, username. The port number may also be listed. These credentials will be required to access the FTP client.
Install an FTP Client Server
FileZilla, Cyberduck, and WinSCP are widely recognized FTP clients commonly used by website owners. For this guide, we will focus on utilizing FileZilla, but feel free to choose any other FTP client you are comfortable with.
Enter Credentials
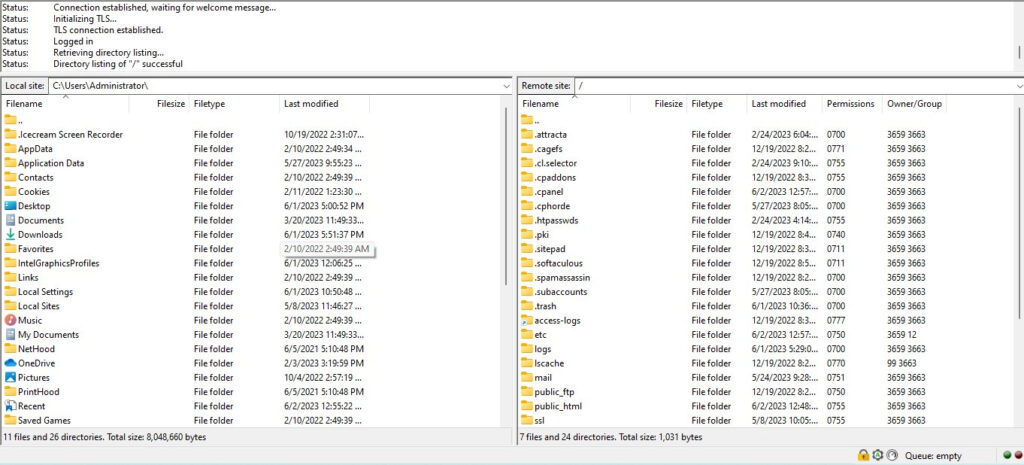
To establish a connection to your website’s server, launch the FTP client of your choice and locate the appropriate option to enter the credentials provided earlier. This typically involves entering the “Host,” “Username,” “Password,” and “Port” fields.

After clicking the “Quickconnect” button, you will be greeted with a successful connection dialog, displaying a set of folders and directories.
Drag & Drop Theme File
Within the FTP client, you will find the server’s file directory. Look for the “public_html” or “www” folder and access it. Inside this folder, you will find the “wp-content” directory. Open the “wp-content” folder and locate and open the “theme” folder within it.
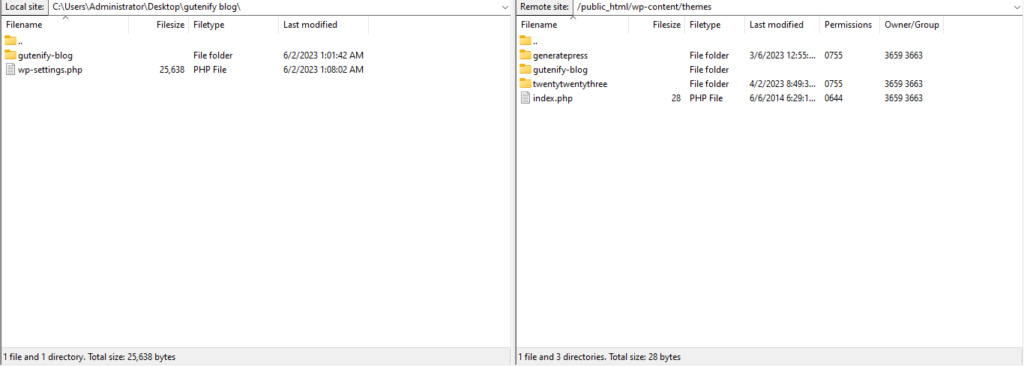
Once you are inside the “theme” folder, you can find the WordPress theme file you wish to upload.
To initiate the upload, drag and drop the theme file from the “local site” section (typically located on the left side of the FTP client) to the corresponding location in the “remote site” section (usually on the right side).
In the example provided, I have successfully installed the “Gutenify Blog” theme, as you can see.
Once the upload process is complete, navigate to your WordPress Admin Dashboard to activate the newly uploaded theme.
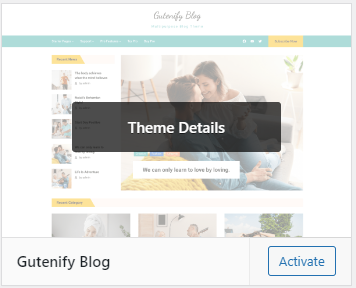
If required, you can now configure any settings specific to the theme. This will allow you to customize its functionality according to your preferences or specific requirements.
Bottom Line
We hope this guide has provided valuable insights into the various methods of installing WordPress themes. In addition to theme installation, we invite you to explore our other resources, such as our guide on what WordPress is and our comprehensive guide on the difference between wordpress.org and wordpress.com.
Whether you’re a beginner or an experienced user, understanding these installation techniques will empower you to customize your WordPress experience to suit your needs.
If you have any further questions or require assistance, please don’t hesitate to contact us. We are here to help.
Leave a Reply