Are you looking to learn how to locally setup WordPress using Local by Flywheel?
In this blog post, we will explore setting up a WordPress website on your local machine using the powerful Local by Flywheel tool. Whether you’re a beginner wanting to experiment with WordPress development or an experienced developer looking for a reliable local development environment, Local by Flywheel offers a user-friendly solution that simplifies the setup process.
By the end of this guide, you’ll be equipped with the knowledge to effortlessly create and manage your WordPress sites locally, allowing you to test themes, plugins, and customizations before deploying them to a live server.
So, let’s dive in and discover how to install Local by Flywheel to set up your WordPress development environment.
Step #1: Download and Install Local by Flywheel
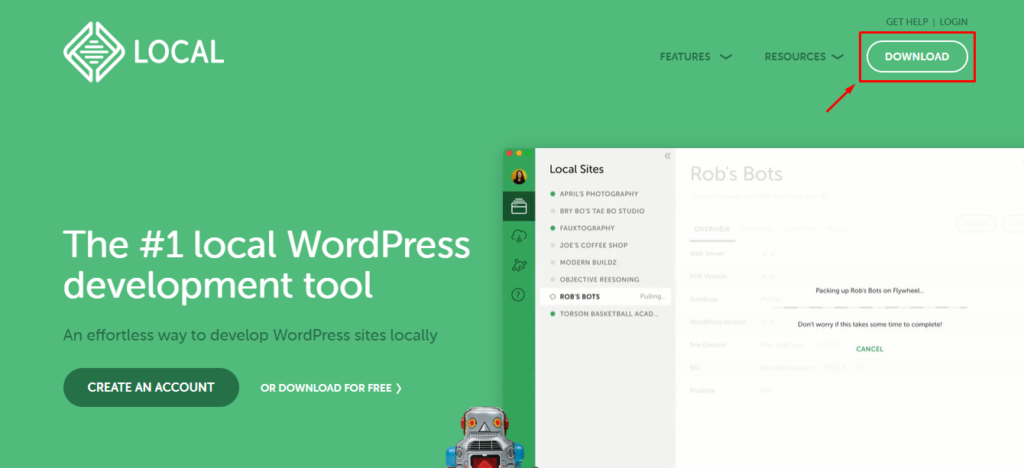
Begin by visiting the official website of Local by Flywheel (https://localwp.com/).
Now navigate to click on the right corner of the download button to locally setup WordPress using Local by Flywheel
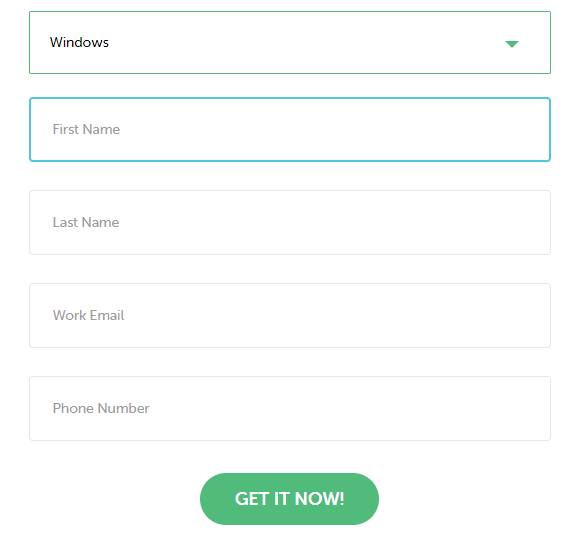
After clicking the download button, a window will open to choose the operating system.

In the next step, fill out the form by entering your details, and click on the “Get it Now” button.
Once the installer file is downloaded, locate it on your computer (usually in the Downloads folder) and double-click it to run the installer.
Step #2: Launch Local and Create a New Site
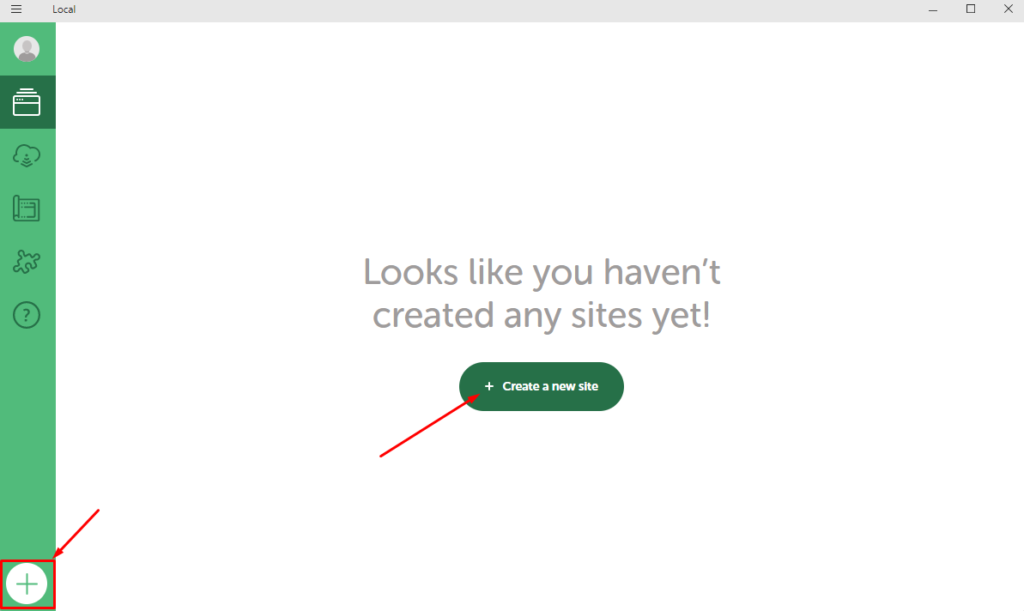
After the installation, launch the Local by Flywheel application. You will be greeted by a user-friendly interface. Click on Create a New Site on the green button or on the “+” button at the bottom left of your screen.
Here at Flywheel, it gives you two different options whether you want to create a new site or want to create from a blueprint.
Create a New Site: This option allows you to begin your website journey from the ground up by initiating a fresh WordPress installation. It allows you to customize your site with various plugins and themes, tailoring it to your specific needs and preferences.
Blueprint: Alternatively, a Blueprint presents you with a pre-existing site template bundled with a carefully curated selection of plugins and themes. This ready-made foundation serves as a springboard for your creativity.
However, since you have just launched Local by Flywheel and have not yet acquired a Blueprint, it is time to choose the remarkable option #1: “Create a new site,” then hit continue.
 If you prefer to use a different tool for setting up WordPress locally? There are other options available, such as MAMP and Docker. If you’d like to learn more about these tools, check out our posts on:
Step #3: Add a Site Name
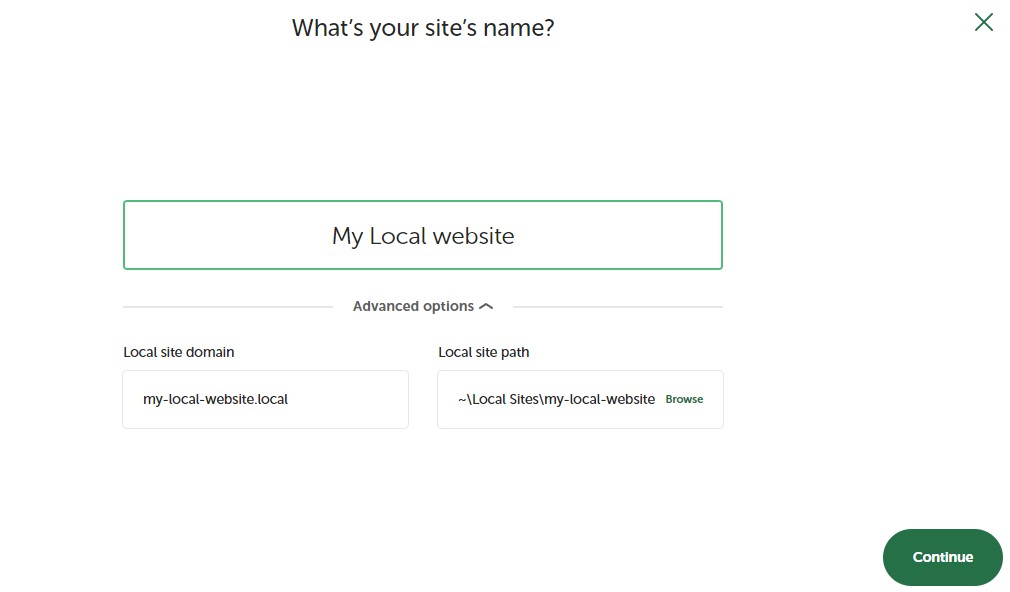
Within the designated rectangular space, add a name to your site. For instance, you may add it as “My local website” or any other name that resonates with your creative vision.
If you click on the advanced option, you’ll see two things:
- The local Site Domain includes your site name and extension(.local).
- The location where you want to save your site on the computer.
Now click on the “Continue” button.
Step #4: Pick an Environment for Your Local WordPress Site
Flywheel typically offers two primary environment options to locally setup WordPress using Local by Flywheel.
Preferred: This is the recommended environment and is suitable for most users. It provides a balanced configuration for optimal performance and compatibility.
Custom: You can opt for a custom environment if you have specific requirements or preferences. This allows you to configure advanced settings such as the PHP version, web server, and database options.
- PHP Version: Select the desired PHP version that best suits your project requirements.
- Web Server: Choose the web server software you prefer, such as Apache or Nginx.
- Database: Opt for a solution that aligns with your needs, like MySQL or MariaDB.
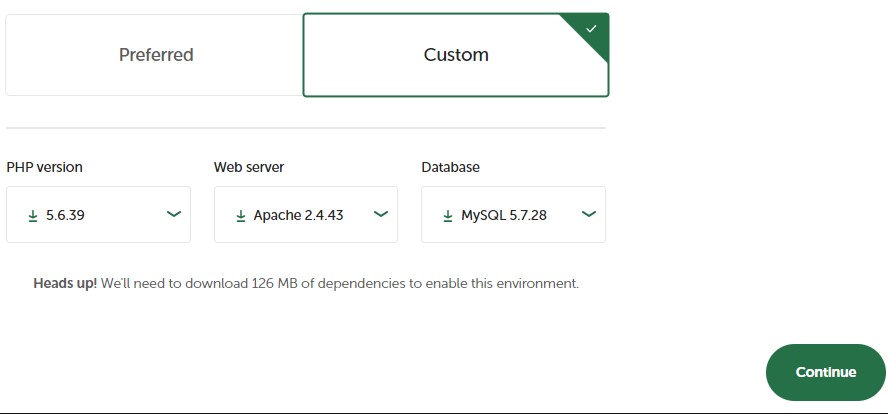
After selecting hit on continue button.
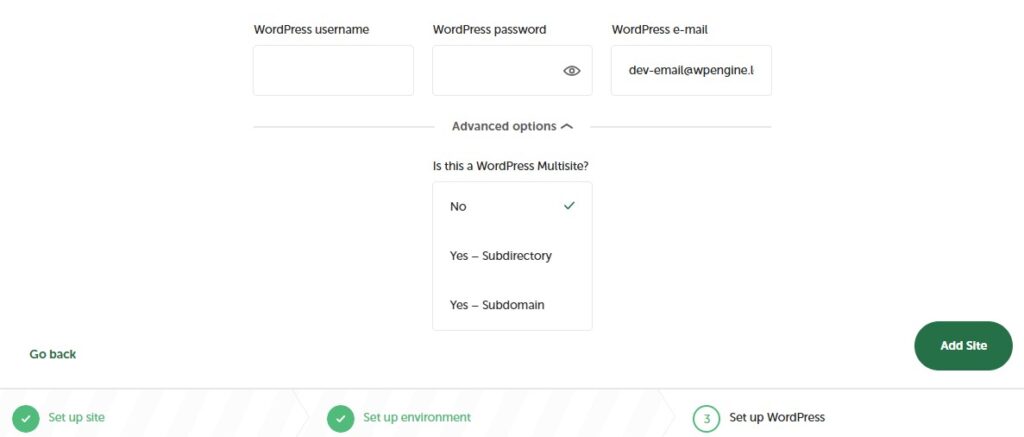
Step #5: Set Up WordPress
To finalize the creation of your site using Local, kindly provide the following information in the designated fields:
- WordPress Username
- WordPress Password
- WordPress Email
Once you have entered, hit on “Add Site.”
Congratulations! Your new local site is now live and accessible on your dashboard, beginning an exciting digital adventure.
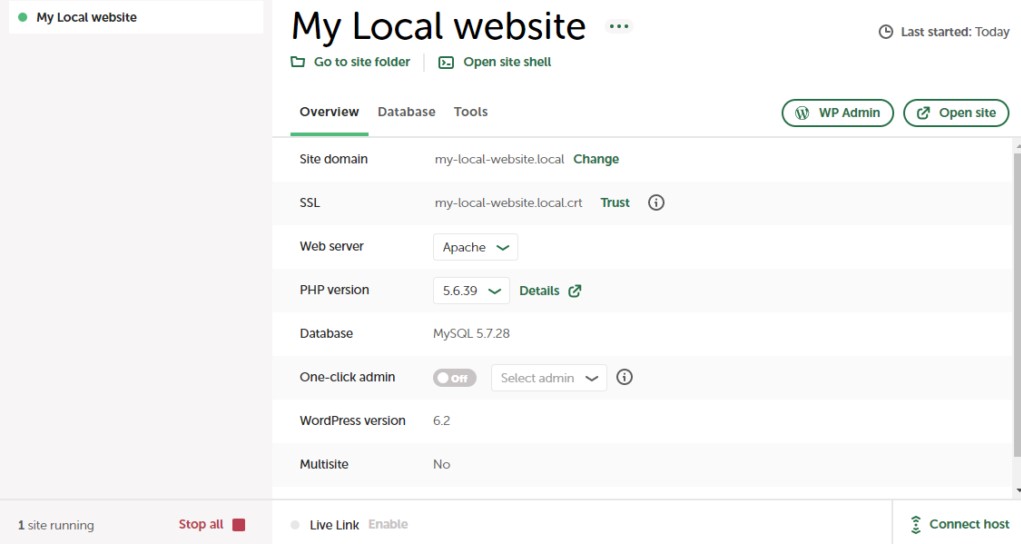
Now to launch the local, click the “WP Admin” button.
Here it opens the wp admin login page, where you enter your credentials to see your WordPress admin dashboard.
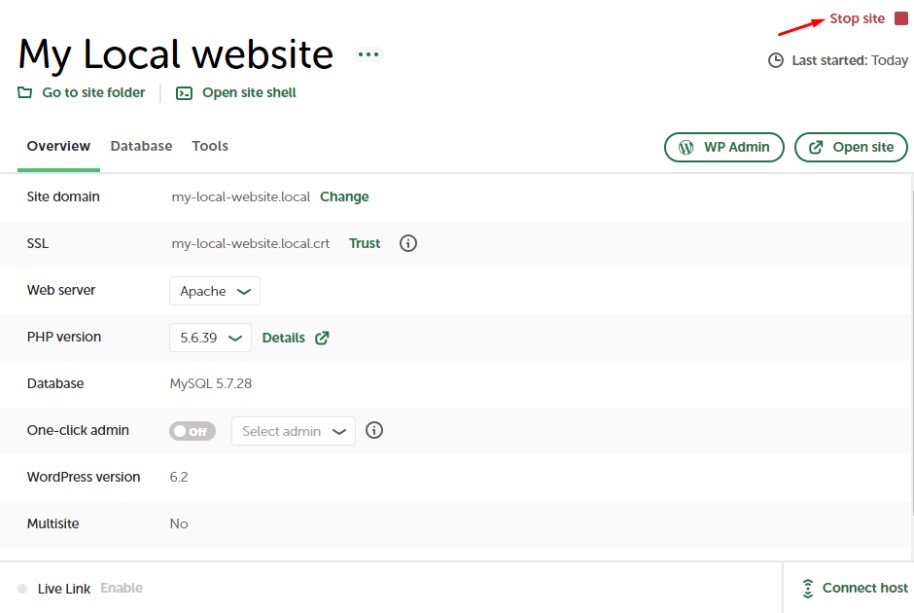
Now, you have the capability to edit your local website directly on your Windows computer.
Once you have completed your editing tasks, it is essential to remember to stop the website from within the Local WP software. To do this, simply locate and click the ‘Stop site’ button.
Bottom Line
Following this step-by-step guide, you have successfully locally setup WordPress using Local by Flywheel. With a robust local development environment, you can now unleash your creativity and quickly build your dream WordPress site.
Local by Flywheel simplifies the setup process, allowing you to focus on designing, developing, and refining your website. Enjoy the journey of creating your WordPress masterpiece!
FAQs (Frequently Asked Questions)
1. Can I use Local by Flywheel on Mac and Windows?
Yes, Local by Flywheel is compatible with Mac and Windows operating systems so you can locally setup WordPress using Local by Flywheel.
2. Can I import an existing WordPress site into Local by Flywheel?
Absolutely! Local by Flywheel allows you to import existing WordPress sites. You can easily migrate your site by using the import feature within the application.
3. Can I access my local WordPress site from other devices connected to the same network?
Accessing your local WordPress site from other devices connected to the same network is possible. This allows you to view and interact with your site using different devices within your network.
4. Can I deploy my local WordPress site to a live server?
Yes, Local by Flywheel offers seamless integration with various web hosting providers, allowing you to deploy your local WordPress site to a live server quickly. With a few simple steps, you can transfer your site to a production environment and make it accessible to the public by locally setup WordPress using Local by Flywheel.
Leave a Reply